4 Mode USB Bike Light Lamp Bicycle Computer 3 Mode Horn Flashlight Cycle Bike Speedometer Led Front Lights Cycling Headlight
-
DetailThe Best Way for Installation
The best installation position of the magnet is on the top of the bicycle spoke. The top of the bicycle spoke has a non-circular structure. After the magnet is locked, it will not swing back and forth, and the wireless signal is stable.
The distance between the magnet and the sensor should be kept at about 6mm. If it is too close, it may become unstable.
The magnet corresponds to the center position of the transmitter liked the picture showed, and the signal is more stable and accurate.
Do you want to get a bright bike light to ride at night ?
Do you want to warn other cars or riders during cycling at night ?
Do you want a cycling odometer to achieve your fitness goals ?
Do you want a loud bike bell to make others be warning ?
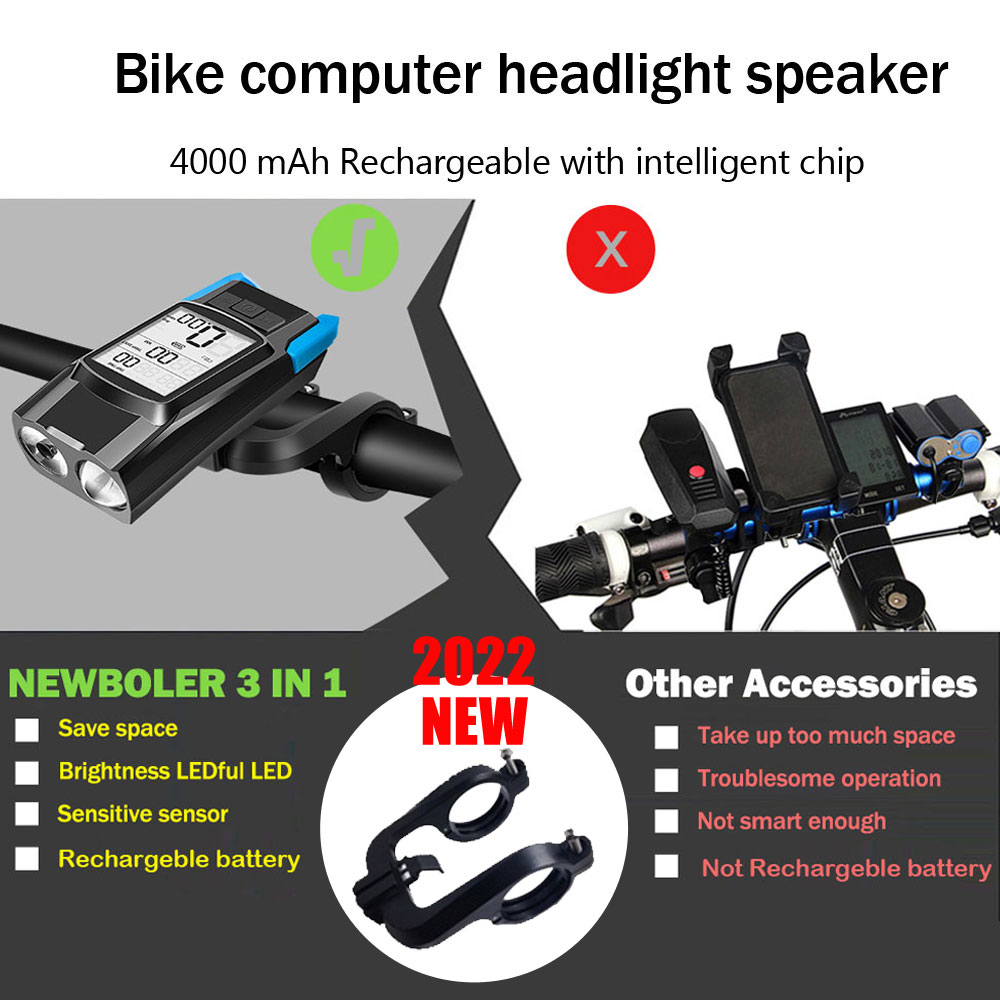
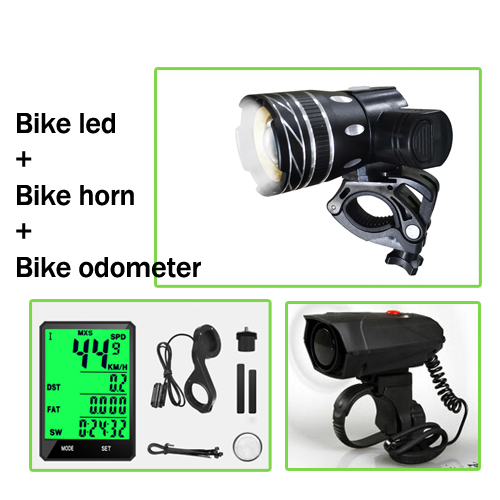
Did your handlebar is not enough spare for all of the gadgets ?NEWBOLER 3 in 1 cycling set is your best choice.


Features
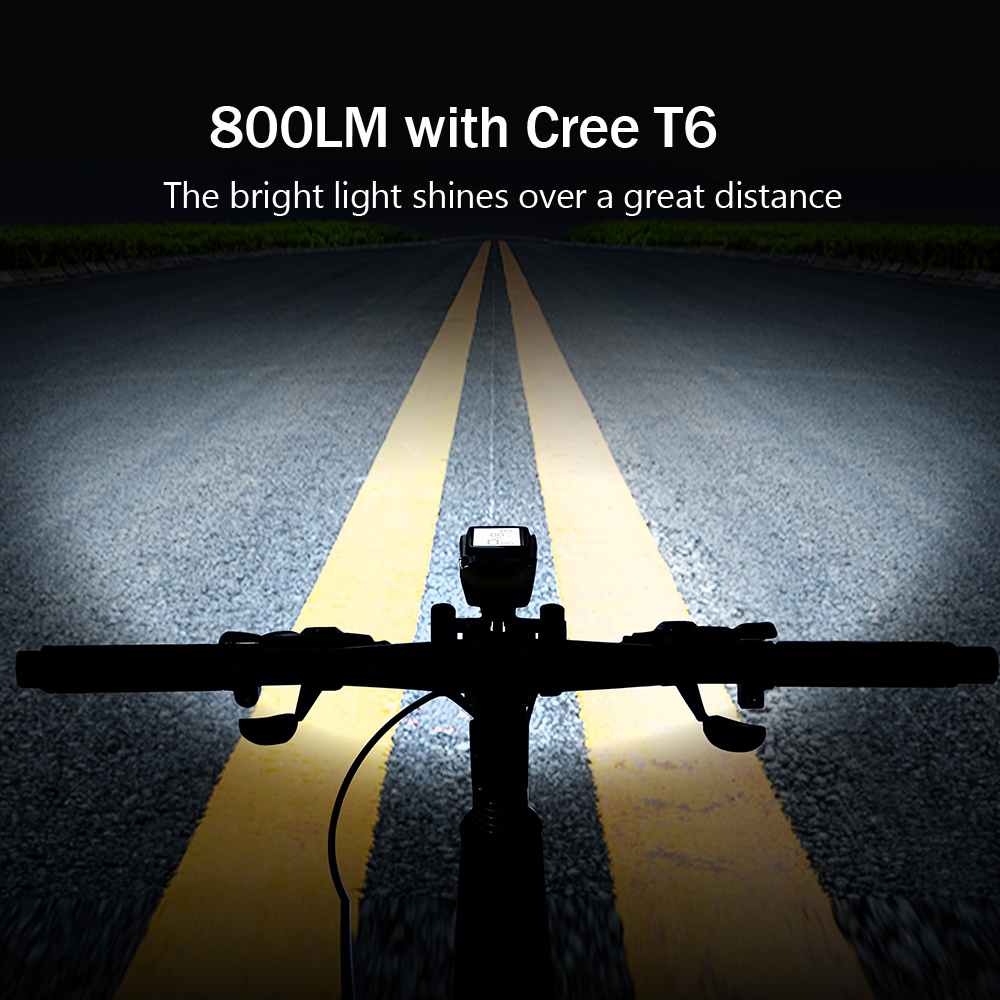
800 Lumens Bike headlight gives you awesome visibility and keep safe distance in the dark.
Bike speedometer with accurate tracking on speed and distance helps you to get more fun of your cycling trip or easily achieve your fitness goals.
120dB speaker provide a clear warning for passers-by riders and cars.
Please enjoy cycling with this wonderful gadget in the anytime to feel your speed!Specifications
Name:NEWBOLER Bike Computer Horn Light
Model: BK-1920
Headlight brightness: 800 lumens
Lighting mode: High/Low/Flash
Effective range: 200m
Electronic horn: About 120 dB Lamp
Light working time: 5hrs/10hrs
Computer working time: 3000hrs
Rechargeable Battery: 4000mAh
Charging mode: USB charging
Recharge time: 4hrs
Sensor battery: CR2032
Sensor working time: 12months, 1hr/day
Waterproof: IP65
Weight: about 145g
Size: about 110*40* 35mm
Color: Red / Blue / Green / BlackPower Source
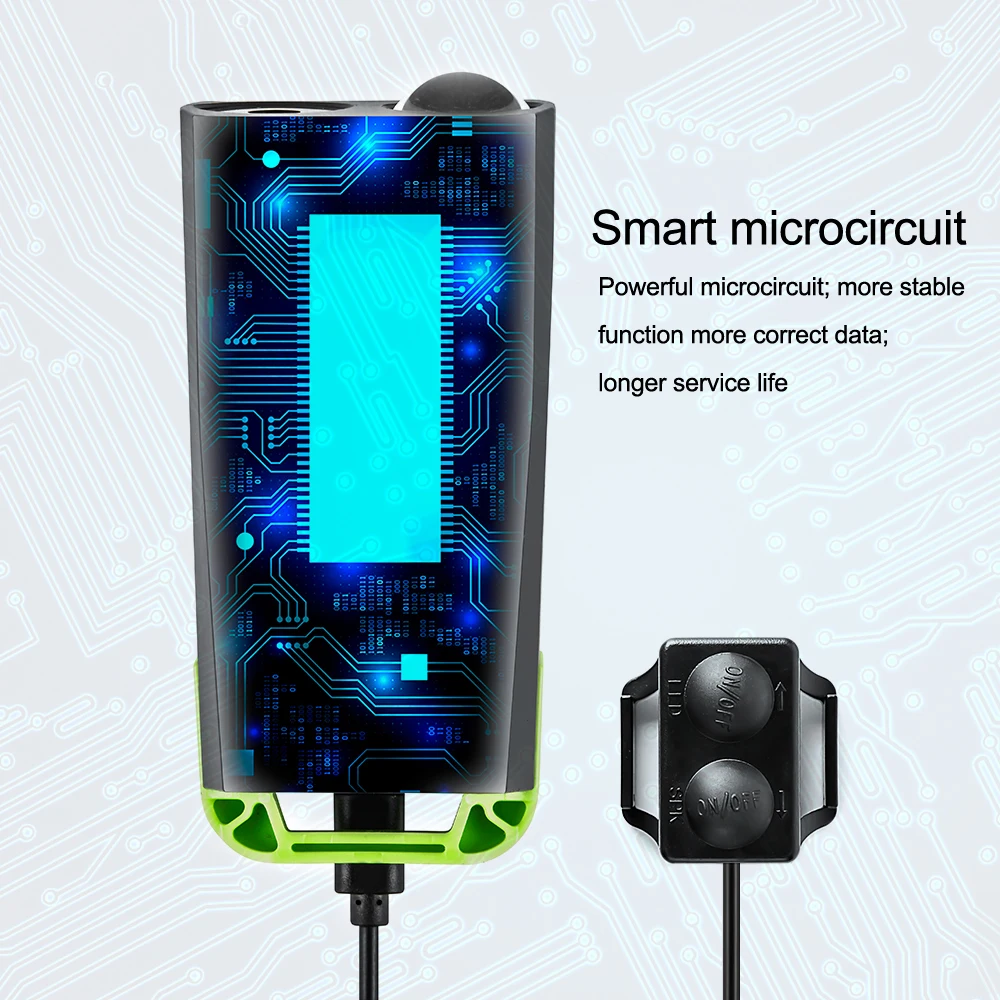
Built-in 4000mAh high quality rechargeable lithium battery, and smart chip to get a better performance as multi function accessories.
Turn on/Turn off/Standby mode
Turn on : Long press Power button after 3 seconds , bike light and odometer will turn on at the same time.
Turn off: Long press Power button after 3 seconds at any status, bike light and odometer will turn off and the screen does not display.
Standby mode: After turn on, the screen will turn into standby mode when there is no any movement after 4 minutes, only clock and battery power will be displayed.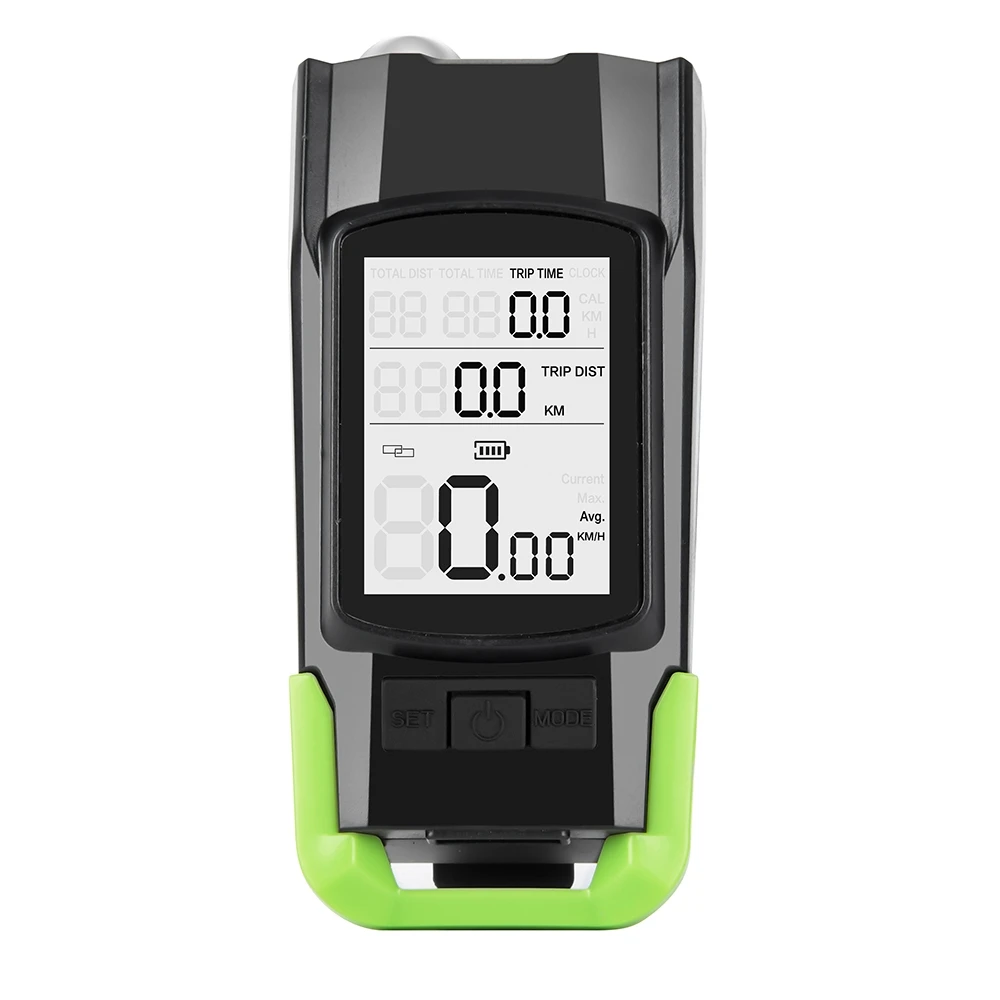
Bike computer
Bike speedometer with accurate tracking on speed and distance helps you to get more fun of your cycling trip or easily achieve your fitness goals.
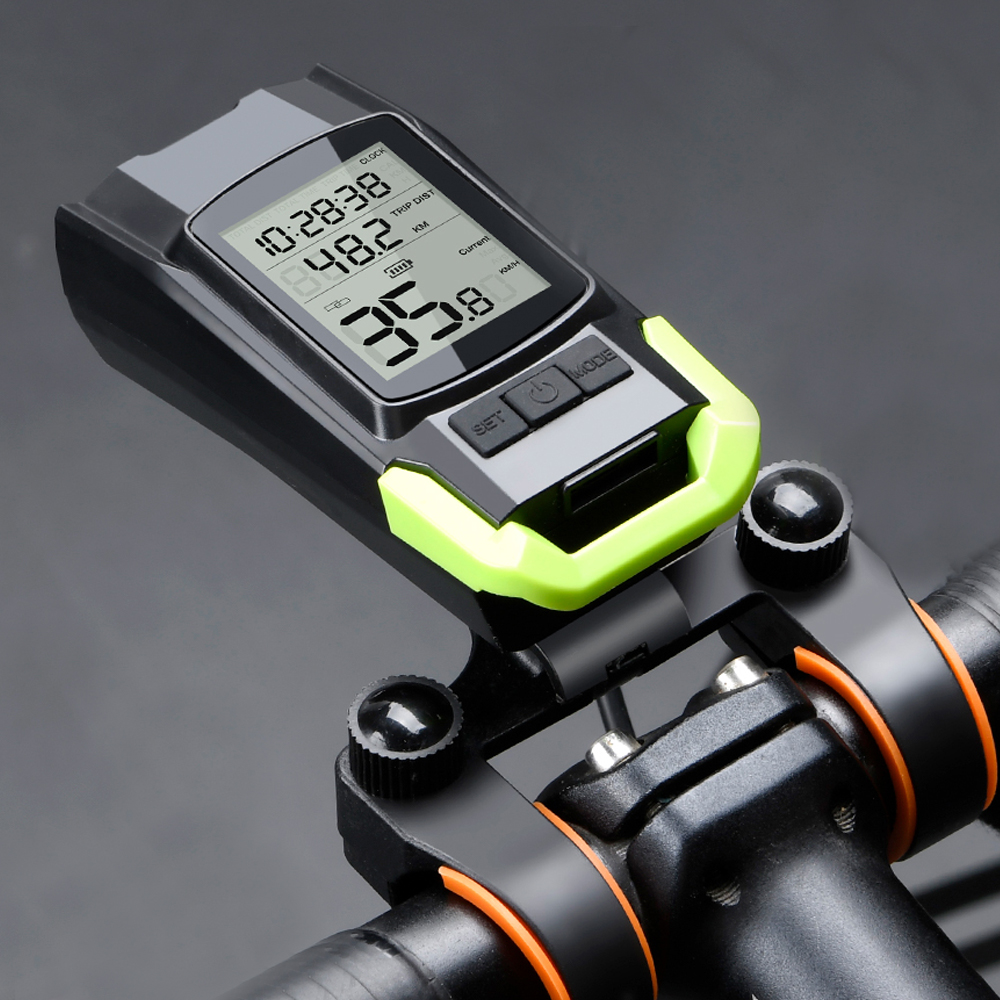
12 FUNCTIONS BIKE COMPUTER: top/current/average Speed, distance, lighting, LCD back light, clock, time, calorie, auto turn off/data storage, power saving etc;
Memory function
When the battery is low, please charge it in time. If the battery is completely exhausted, it will cause all the data to be completely lost. The factory mode will be restored after recharging.
Trip Distantance (DST) : Please long press Power button for 3 seconds to clear DST, AVS, MXS, TM and CAL value to zero. The bike light and computer will also be turn off.
All data clear : Please long press "SET" and "MODE" button for 10 seconds to clear all of the data.
How to reset the circumference, weight, clock : Keep Press MODE key and SET key for 5 seconds at the same time, the host enters the setting state.
Connection
Bike odometer sensor connect with magnetic by wireless, bike bell connect body by wiring .
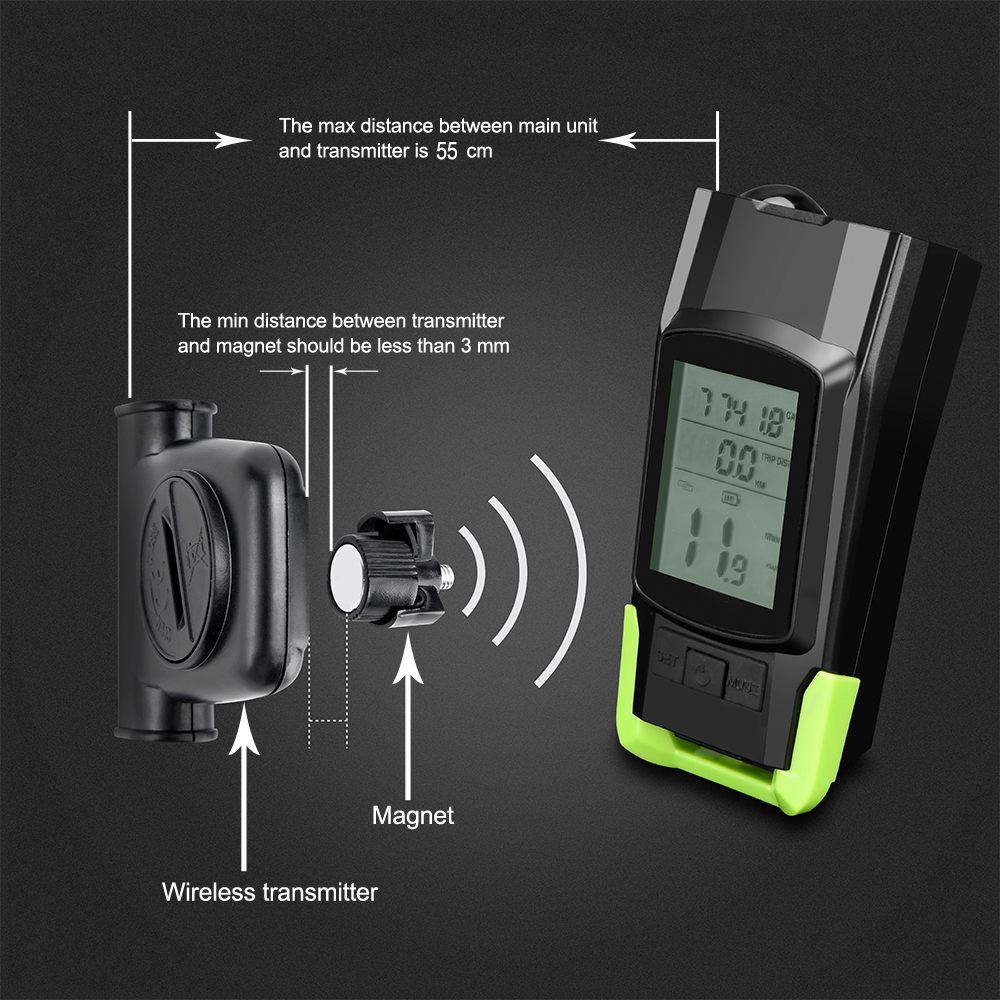
The working principle of wireless version
wireless distance ≤ 55 cm/21.65 inch
distance between magnet and launcher should be 3 mm or so
Bright back light
2.1’ big screen LCD display with sustained backlight,allows you to read the digital clearly in the deep dark night or in the long tunnel.
Keep press SET key for 2 seconds to turn it on, keep press SET key for 2 seconds to turn it OFF.
Bike LED light
800 Lumens Bike headlight gives you awesome visibility and keep safe distance in the dark.
Wired control or Button control, press button "LED" to change the model or press the turn on button on the body to change the model. There are 4 modes of brightness.
(1)100% brightness for 1 Led;
(2)100% brightness for 2 Led it will turn to 60% brightness if there is no movement after 3 minutes;
(3)60% brightness for 2 Led;
(4)2 Led flash, 2 Led closed.
Reasonable Security Ray
Compared with other bike light,this bike headlight features with anti-glare design. It is bright for the night riders and it won’t blind drivers, increasing safety for city riders and commuters who find themselves caught in the dark.

Spotlight / Floodlight
the rang of spotlight make the bright more longer, the floodlight make the bright more wider. to make sure you will have a clear vision at night.
Doule T6 LED
800 lumen headlight with 3 modes(bright light; weak light; flash;), super bright, gives you awesome visibility and keep safe distance in the dark.
Bike Bell
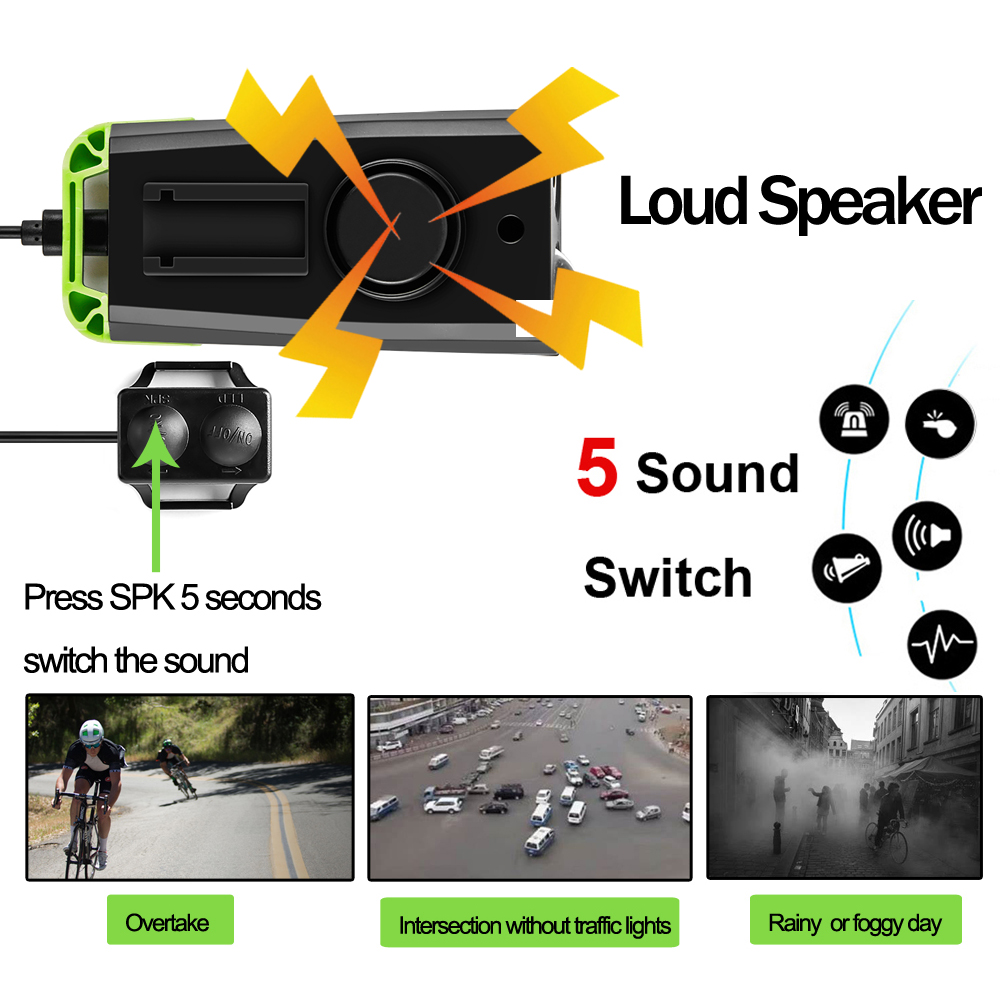
120dB speaker provide a clear warning for passers-by riders and cars.
Please enjoy cycling with this wonderful gadget in the anytime to feel your speed!
Wired control. There are 3 kinds of sound mode. 120dB. Long press button "SPK" for 8 seconds to select the sound mode that you wanted. Suitable for all kinds of users.

Water resistant
Water resistant , but do not suggest use it for a long time in rain.

Long battery endurance, low consumption
Super Long Battery Duration: 4000mAh built-in rechargeable Li-ion battery and Low energy technology together bring you up to 3000 hours working time (headlight off ,only odometer work).
it offers 6/12 working hours when you turn on the head light.
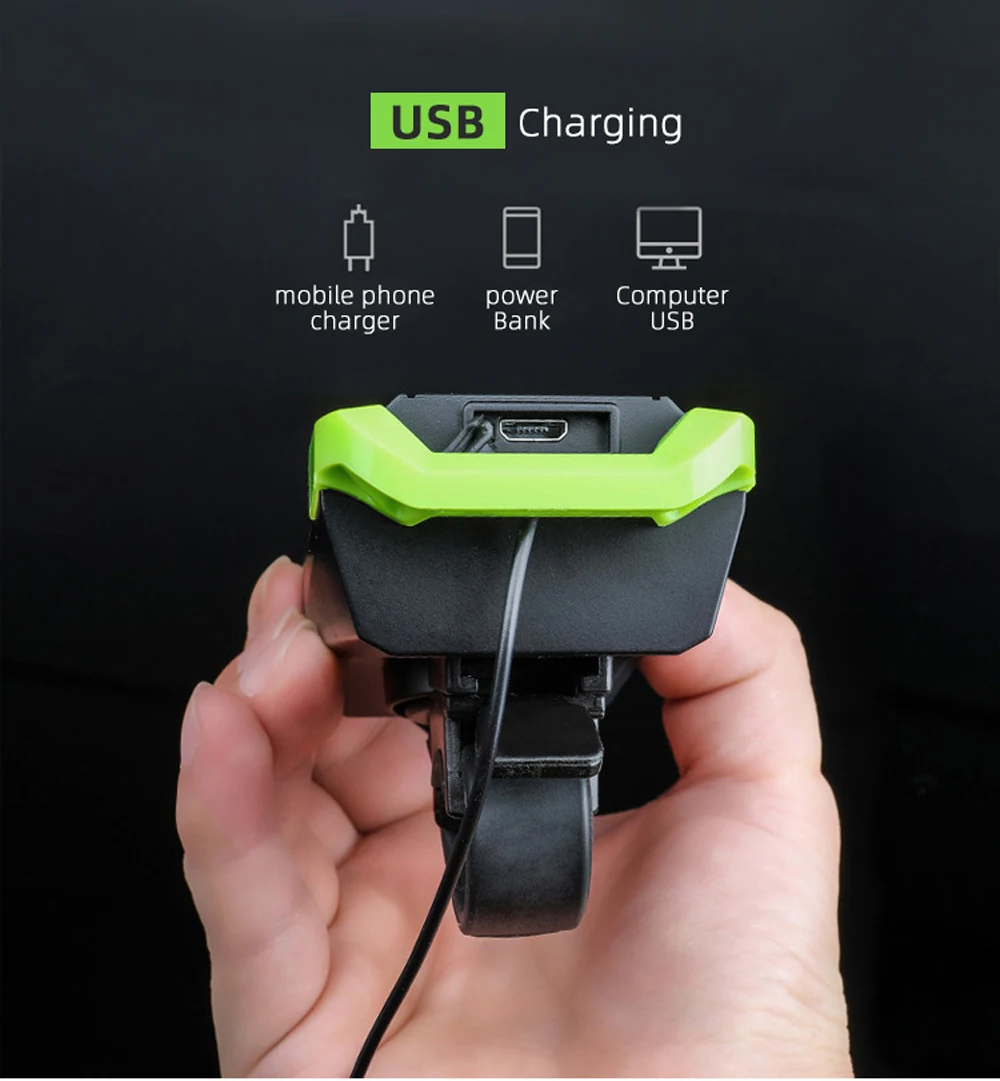
USB charging
Please note, it can not be charged by computer USB Port, only Mobile phone charger and Power Bank charger.Or it will continuous restart.
Bike computer inspection method
Method: Insert the computer to base. Then one hand holds launcher, one hand magnet. Approach the magnet to launcher and move it up and down. It is normal if there is speed display.(as the picture)


How to install the magnet and launcher
The best installation position of the magnet is on the top of the bicycle spoke. The top of the bicycle spoke has a non-circular structure. After the magnet is locked, it will not swing back and forth, and the wireless signal is stable.
The distance between the magnet and the sensor should be kept at about 6mm. If it is too close, it may become unstable.
The magnet corresponds to the center position of the transmitter liked the picture showed, and the signal is more stable and accurate.
Wireless launcher needs a 2032 button cell.
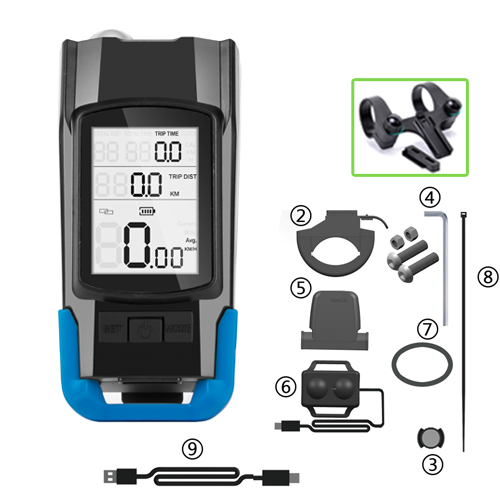
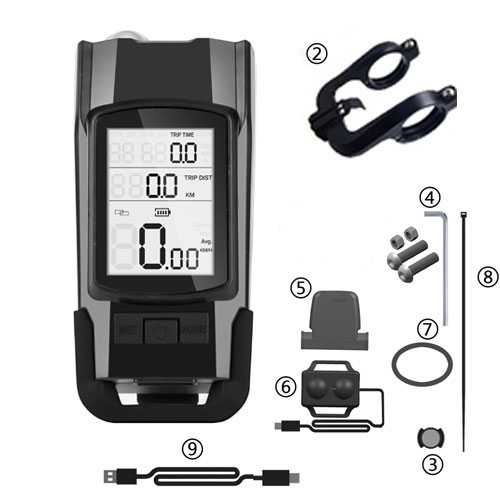
2 Brackets are optional
2 holders are optional for different bike handlebar and reading habit
Easy to install, and save your handlebar space.


4 Colors are optional

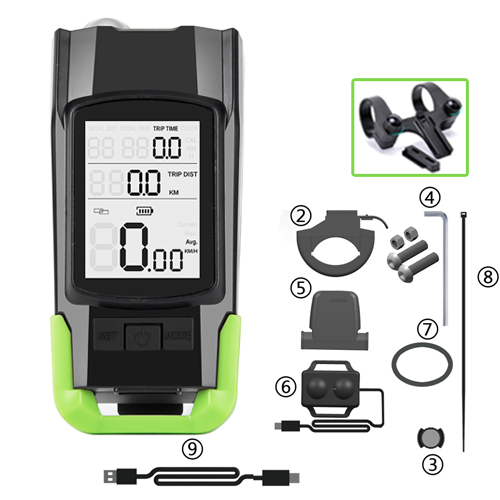
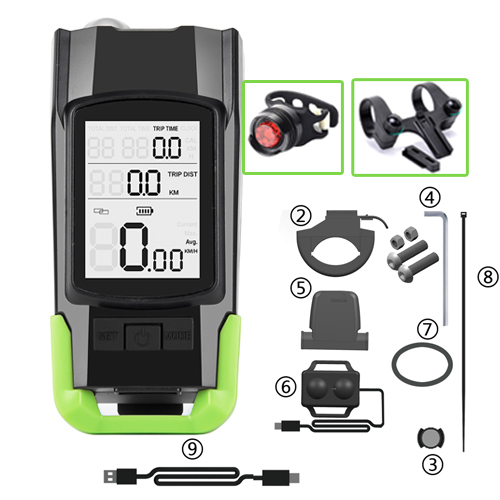
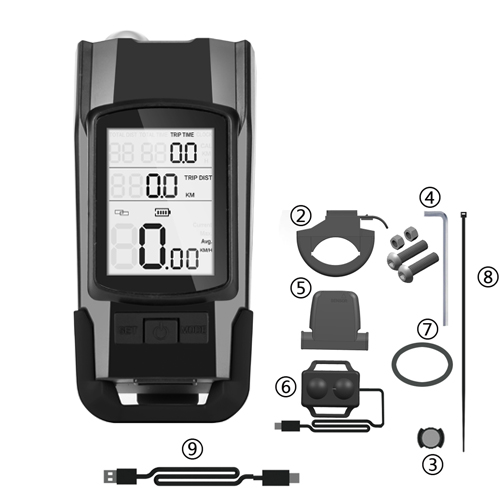
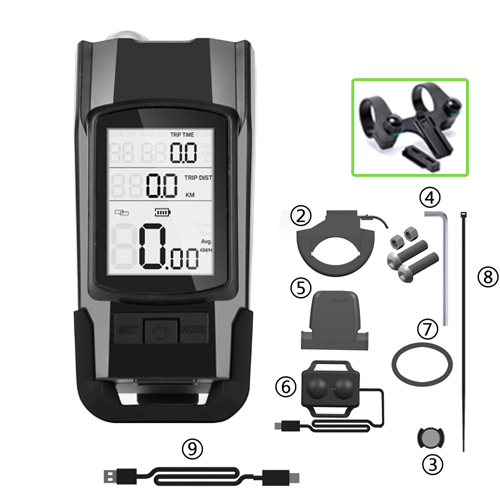
Configuration
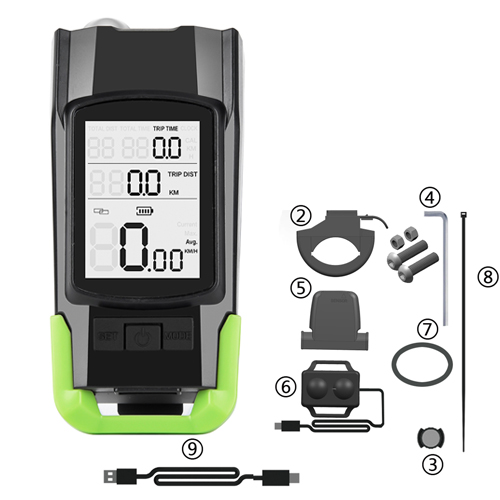
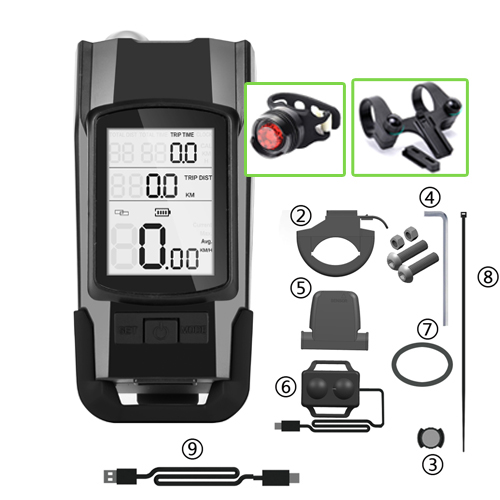
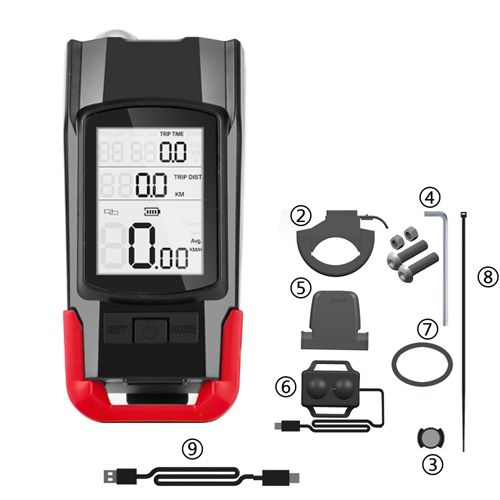
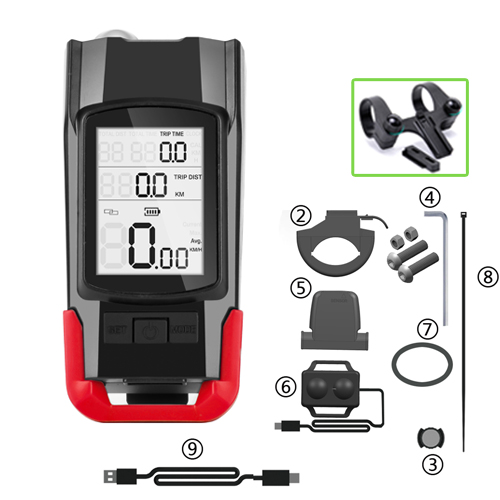
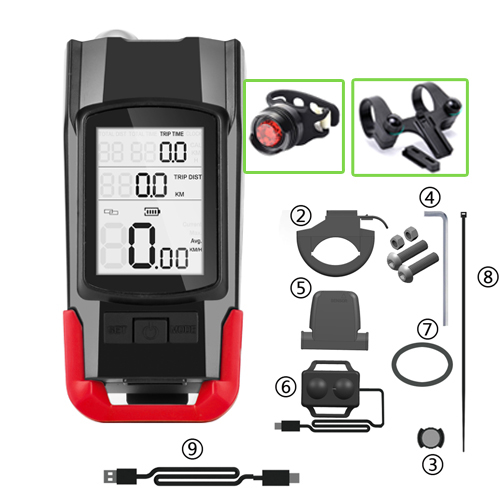
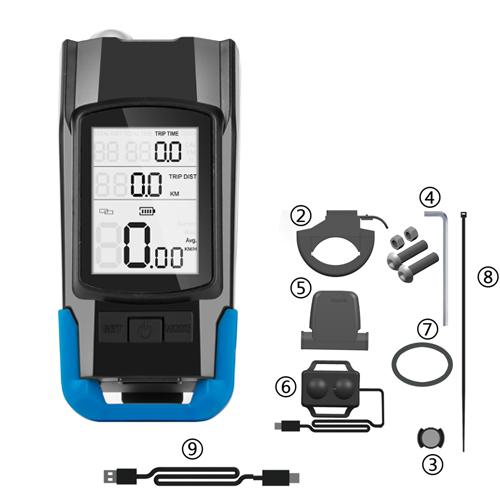
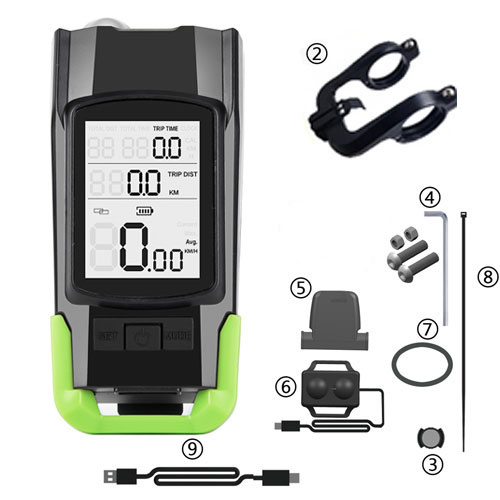
( 1 ) Main Unit
( 2 ) Bracket
( 3 ) Spoke Magnet
( 4 ) Installation Kit
( 5 ) Speed Sensor
( 6 ) Lighting And Sound Extension Controller
( 7 ) Extension Controller Fixed Strap
( 8 ) Zip Ties
( 9 ) USB Charging Cable
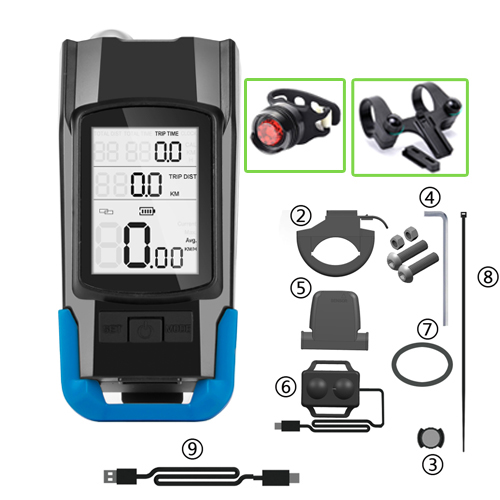
(10) Central bracket (Optional)
(11) Bike Tail light (Optional)

Setting for odometer
Keep Press MODE key and SET key for 5 seconds at the same time, the host enters the setting state, when setting, away from the display and other electronic products, it may be interfered, do not turn the wheel when setting, when the motion signal is received, the setting will automatically exit. Press the power key to exit the setting when the setting is complete.
Details Setting
[1]
Enter the tire perimeter setting, press the MODE key to set the value from left to right, and press the SET key to change the value. A total of four values need to be set in millimeters.
[2]
Enter the metric/imperial setting, press SET to switch between metric/imperial units, and press MODE to confirm.
[3]
Weight setting, press the SET key to set the value from left to right, the unit is KG, press the MODE key to confirm.
[4]
Clock setting: press the set key to set the value, press the MODE key to switch the next bit,
[5]
Reserve the location of the setting, please ignore this setting
[6]
When the settings are complete, press the power key to exit the settings
Tyre size correspondence table

Important Tips
For possible reading inaccuracies, customers should know the following information
1. the distance between monitor and sensor should below 80 cm
2. the distance between sensor and magnetic should below 3 mm
3. In order to enhance anti-interference, we used ID coding technology in the design. When the battery is just installed, the speed sensor needs to work continuously for 1 minute to recognize the new sensor.Please refer to the video and test for one minute, then check if the speed sensor is working properly
4. The wrong installation of the speed sensor will also cause 0 display. please refer to the picture below to make sure the installation is right.
By the way, this bicycle computer is a wireless product, and the electromagnetic waves of the environment will affect its normal operation.
When using it, we should avoid the electrical equipment at work: household appliances, high-voltage wires, transformers, high-voltage cables, charging stations, elevators and other electrical equipment at work (code table speed display 0 when interfered by them)
5.The Data Sensor consists of a receiver and a magnet. To accurately measure the data, the sensor must be fixed firmly. The receiver should be aligned with the magnet at the same level.Q & A
07.17.2020, Customer A suggested a tire circumference comparison table.
[A]:it had been offered at the bottom of the description.
07.25.2020, Customer B said the tail light did not work.
[A]: There is a piece of paper in the middle of the battery in the taillight, which needs to be removed to light up.
07.30.2020, Customer C , there is no data at all, the computer can not find the sensor.
[A]:it is suggested the disctance between the sensor and computer should be below 100cm .The sensor can be installed on the front fork, and the top of the front fork, it will be connected in good condition.
08.05.2020, Customer D , the speed turn to 99km/h sometimes.
[A]:The installation is not correct. we suggested reboot the computer , then set the correct tire circumference . and make sure that the magnet is aligned with the center of the sensor,please see the picture below. If the magnet is aligned with the corner of the sensor, the magnet attraction is not accurate enough, and it is prone to abnormal speed。
-
Customer ReviewsNo comments
